New Sights For An Old Rossi
Copyright 2004 by Junior Doughty

Click thumbnails for full size photos

Rossi M92 357 Mag

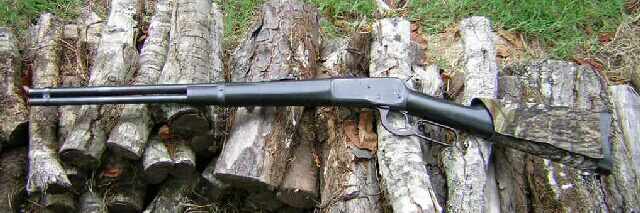
This Rossi M92 in 357 mag was a Christmas gift from last exwife in the early 1980s. Although she's long gone, the rifle is still hanging around. It's always been one of my favorites. I've mentioned it several times here in the Frugal Outdoorsman. It was my hog rifle using the Lee 358-140-SWC @ 1400 fps.

After my divorce in 1989, I let my son-in-law keep the Rossi. Last month, September, 2004, I decided to start shooting it again and return it to its original use—a hog and beer can rifle. Lo and behold, my now-61-year-old eyes couldn't see the sights against a dark background. Both front and rear sights disappeared when pointed at something like a tree trunk in the shade. I needed a peep rear and a fiber optic front if I planned to go after a boar hog in a thicket.

Click for full size popup photo Soon after Santa brought the rifle, I discovered no one made adjustable sights for it, mainly due to the oddball size of the rear dovetail. (They still don't for the old ones.) So I made the non-adjustable rear into an adjustable rear via a hacksaw and a Williams WDOS Dovetail Open Sight ($12.45). As the photo shows, I used the rear of the WDOS and attached it to the front of the factory sight with two screws via drilled and tapped holes. The blade is a Williams 3/16" SQ Blade ($7.05). And, yes, I know I boogered those screw heads.

Click for full size popup photo But although I could see the square blade rear just fine back in the 1980s, here in 2004 it had to go. So I replaced the blade with a WGRS Aperture Holder ($5.19), and I installed a peep aperture in the holder. The Williams tech man said the holder would slide right in the slot for the blade, but it didn't, probably because of the age difference. It took a couple of minutes work on the holder with a triangular file.

The side-view photo shows a 1/2" x .050" target aperture. For hunting, I'll use a 3/8" x .150" aperture.

Note: if you don't want a peep rear and would like a blade fiber optic rear, both Brownells and Williams sell one which fits the WDOS blade slot.

Click for full size popup photo The centerline of the aperture and the centerline of the bore did not match. One pointed upward, the other downward. To correct that situation, I aligned them using two bubble levels. Putting the rifle butt-up in a vise—jaws on the barrel, not on the thin magazine tube—and using leather pads to protect the bluing, I placed a small carpenter's level against the barrel and wiggled the rifle back and forth until the barrel was perfectly perpendicular. I then sat a very small bubble level on the rear of the aperture and adjusted the WDOS elevation screw until the rear of the aperture was perfectly level. Both bore and aperture then pointed in the exact same direction.

Luckily, the screw still had plenty of "up" adjustment for later refinement of Point Of Impact. As I would have to make the front sight, I would make its height so the desired POI came with the aperture still parallel to the bore. I could make any later refinements to the POI with slight turns of the WDOS elevation adjustment screw.

Click for full size popup photoHere we see the original front sight, pinned to a slot in the top of the front barrel band. Needless to say, no one makes a fiber optic replacement. So I made my own. And, of all things, I used the little red plastic spreader which came in a 50¢ package of Kraft cheese 'n' crackers.

(Hey, we don't call this place the Frugal Outdoorsman for nothing!)

Click for full size popup photoHere we see the new front sight. As the slot was about .065" wide and the plastic spreader was about .100" thick, it took a few minutes work with a file to make them mate. The plastic is stronger than you'd think as I grew tired of filing and hammered it in place. I reinstalled the pin for safety's sake, drilling the hole through the plastic sight with a 1/16" bit held in a tap handle.

The photo shows the sight as first installed. If you'll notice, its front is slightly higher than its rear. When filing it down to adjust POI, I gained a better sight picture with the rear of the sight slightly higher than its front. At the shooting bench, it was a simple matter to raise the purposely low POI via judicious use of a file.

My Rossi now sports adjustable sights which I can see against any background. The red plastic front sight doesn't compare to a Williams Firesight, but it works just fine. And it was free!

In today's money, my costs were:

WDOS sight #1609 @ $12.45 + WGRS aperture holder #11535 @ $5.19 = $17.64 total.

Click for full size popup photoHere is a cheese spreader and the cut-off front of the Williams and the cut-off rear of the Rossi factory rear sight. I have several of these cheese spreaders, so if you can't find Kraft cheese 'n' crackers in your area, send me a SASE and 50¢ and I'll send you one of mine.

Junior Doughty
190 Major Doughty Road
Tullos, Louisiana 71479

Click for full size popup photo Update: I added a 1/4" long, .060" diameter green fiber optic rod to the top of the cheese spreader front sight. I simply V-ed the top of the front sight with a triangular file, then added a tiny daub of Super Glue® liquid to the V, then carefully placed the green rod in the V.

Hint: Squeeze a drop of Super Glue® liquid onto the tip of a toothpick. Squeeze just enough glue to form a ball on the tip of the toothpick. Then touch the tip of the toothpick to the V. Spread the glue up and down the V. Then ease the fiber optic rod in place. Give the glue 30 seconds or so to dry. Then, with the tip of the toothpick,
spread even smaller daubs of glue along the fiber optic rod/sight junction.

The green rod doesn't look very bright in the photo, but in actual use it stands out sharply against a target. And it's fast and easy to find sitting there on top of the red front blade. If you prefer a red fiber optic rod, some brands of cheese 'n' crackers come with a yellow cheese spreader, which would contrast nicely with a red rod.

If you don't want to buy a $23 package of fiber optic rods from Brownells, for $2 I'll sell you a 9" rod, which is enough for many sights. Click here.

Cool new sightHere's a look out my front door at the sight after I swapped the green rod for a red rod.

I painted the rear of the cheese spreader sight black, so when I look through the rear peep all I see is a black blade topped with a red dot.

Cool, huh? Cheap, too!


Home     Back to the Make It! section