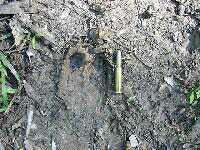
 As regular Frugal Outdoorsman readers know, there's an old wild boar living on my riverbottom land. I take frequent 2-mile round trip hikes on the bottom land to check a Paleoindian site for looter damage, and I usually see his tracks during those hikes. The track on the right with a 30-30 round beside it for scale is an example. He's always alone, which is common with old boars. They hang with the herd only when a sow is in heat.
Twice while headed out I saw his fresh tracks headed in. He had followed me as I walked into the woods. Maybe that should cause alarm, but I don't think so. I've walked in to the Paleosite and out at least 100 times over the last 4 years, and by now the old boar knows me. He didn't get to be his age and size by being dumb. I'm always armed and he knows it.
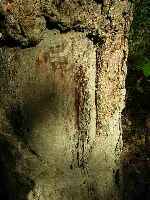
I looked for a place to install a leaning tree stand, but limbs and heavy brush would obscure a good camera view of the scrape. Besides, it might take a day or two of watching, and in order to stretch my legs I'd have to climb down from the stand and climb back up again—way too much movement. I needed a ground blind. And there about 40 feet from the scrape tree was the perfect spot.
My Ruger Super Blackhawk 44 magnum pistol filled the need perfectly. However, the 240 gr hard-cast bullets I normally used would kill the boar for sure, but they would put a hole completely through him and dissipate much of their energy on the woods beyond him. They might not drop the boar in his tracks unless one hit him in the head. I would only have time to aim at hog, not at hog head. I needed a bigger, softer bullet. I estimated a time lapse of about 4 seconds from the moment of my realization that he was charging to the moment when he entered the blind with me. I would get one fast, frantic shot, and it must stop him. The reader at this point probably thinks I'm a damned fool. However, an element of danger adds much excitement to hunting. Ask anyone who hunts grizzly bear or Cape Buffalo. Besides, who wants to die a lonely old man in a nursing home?
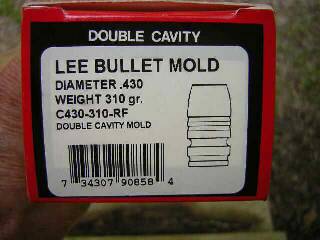
I ordered a mold and began casting. It cost about $18 from MidSouth Shooters Supply.
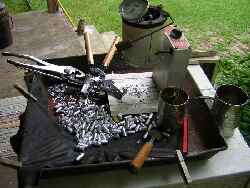
Note the red carpenter's pencil which I use to lube the bottom of the sprue plate and the top of the mold blocks. Note the rusty old baking pan which contains all the casting equipment and which catches every last particle of lead. The session over and the equipment put away, I dump the pan into the cooled-down pot. No waste and no pollution. The Lee C430-310-RF mold you see was probably the easiest to use mold I've ever held in my hands. All the bullets dropped out like they were lubed with butter. Good job, Lee Precision. The casting session shown above produced 152 bullets. At a cost of only $18 for the mold, I figure it amortized itself with its first usage considering the fact that big ol' factory-cast 44 bullets cost from 10¢ to 25¢ each plus shipping. Here's the data on those 152 bullets:
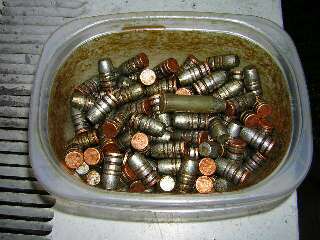 I installed gas checks on the bullets and sized them with a Lee push-through .430" sizer. I lubed them before installing the gas checks and sizing, and I lubed them again after sizing.
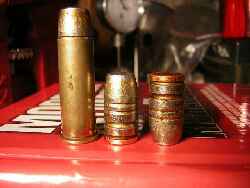
Here we see the bullets in the plastic bowl I used to lube them. The loaded round is for scale. I loaded the bullets using a near-maximum charge of surplus WC820 (n). The Chrony results were:
The bullet will stand on its nose! The C.O.A.L. of the round you see was 1.642" and a little over the SAAMI maximum of 1.610". It worked fine in my Ruger pistol, but it might not feed in your lever action. However, look closer at the round and you'll see that the bullet could be seated a little deeper. With an R-P case trimmed with a Lee hand trimmer and with a bullet seated in the middle of its crimping groove as you see in the photo, my measured usable case capacity was 1.4 cc.
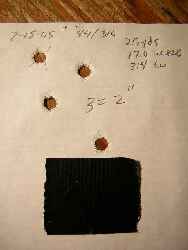
Here we see the first 4 bullets fired. I fired the one at the upper left, then lowered the pistol's rear sight and fired the other 3 rounds. To my delight, the 314 gr @ 1225 fps load centered exactly above the POI for my regular 240 gr load.
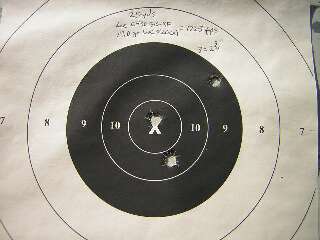
The target was the 5 1/2" bullseye of an NRA B-8C (P) 25 yard pistol target placed at 25 yards. Three shots in 2 3/4" at 25 yards as you see here wasn't much to write home about, but I wasn't loading for tiny groups. My goal was all 314 gr bullets in the bullseye, and I met that goal with these shots and all which followed. The Taylor Knock Out value is a widely used guide for judging a load's ability to stop dangerous game. For my 44 magnum 314 gr @ 1225 fps load, the TKO computes at 23.57. That load is virtually identical to the TKO value for a 300 Winchester magnum 180 gr rifle load at 23.76. I added the above to the 314 gr bullet's huge meplat and pure lead composition, and I figured I had the ideal wild boar load in case the ol' boy decided to share my blind. One 44 magnum round anywhere in the body of my wild boar will stop him, no doubt about it in my mind.
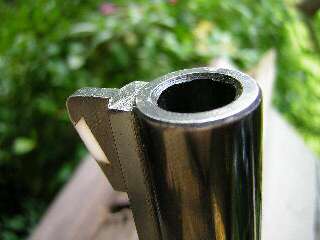
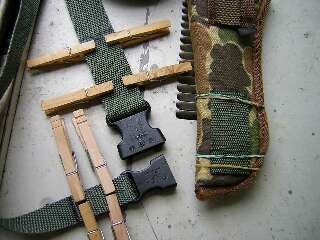
I call this "black bore" condition. Not only is there zero evidence of lead anywhere along the bore, the bore actually looks somewhat lubricated. I tune cast bullet loads for black bore condition in all of my cast bullet rifles and pistols. A bore in this condition and used with a load tuned for this condition will never need cleaning. Open the full size picture and notice the sharpness of my pistol's lands at the crown. This pistol was made in 1974, the first year of New Model Super Blackhawk production. More than 50,000 bullets have exited its muzzle. A barrel kept in black bore condition will last forever. Well, the pistol and load ready for the boar in case he did something uncharacteristically stupid, I needed a holster, right? From out of the drawer in which they had rested for about 15 years, I retrieved my Uncle Mike's camo belt and #9 camo holster (discontinued). I never liked that belt, and now I liked it even less. I put it and the holster on, holstered the pistol, then sat in a chair and pretended I was in my boar blind. To pull the pistol with its 7 1/2" barrel required a loooong arm movement to the rear. Then, to aim it required another loooong arm movement to the front. The boar would be in my lap before the pistol pointed in his direction. I removed the #9 holster from the belt and put my brain to work. What I needed was a way to clamp the holster to the outside of my right calf. I dug out the box of nylon straps and buckles I had ordered several months earlier from strapworks.com After a couple of hours of head scratching, I came up with a design. Here's what I needed:
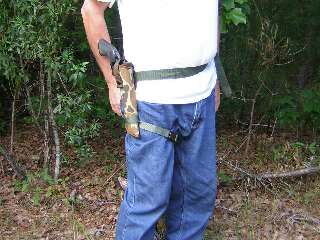
Using more epoxy, I attached the webbing to the buckles. The clothespins hold the webbing together while the glue dries. The epoxy is under the clothespins only, which leaves a hinge in the middle of the joint. Glue dry, I cut the webbing to the proper lengths and sealed the ends with a match flame. The proper lengths for me were 1 1/2" = 53" and 1" = 39". Your needs will vary according to the size of your belly. Mine measures 40". Here's the holster in the carry, walking through the woods position. Notice the 1" webbing looped around the toe of the holster. It keeps the holster from sliding back and forth as I walk.
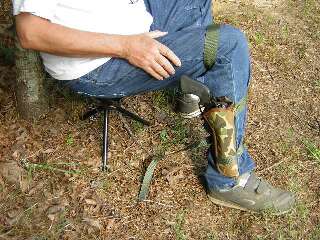
To install the holster around my calf, I simply removed it from around my waist and looped the The holster, tight against my leg, does not move when the pistol is drawn lightning fast. Note the proximity of my right hand to the butt of the pistol. I can draw and aim the pistol in about the same amount of time it would take to simply draw the pistol from an at-the-waist position. With the pistol in the holster as you see it here, I walked around my front yard to determine whether or not it would stay in place during short movements, like stretching legs, taking a leak, etc. It stayed in place. The pistol ready for the wild boar, I need to head for the bottom land and build a blind. Stay tuned to the Frugal Outdoorsman for the resulting photographs—if I get them. . . .
|
