in a 30-30 Winchester Model 94
Copyright 2003 by Junior Doughty
|
In my previous article on Cast Bullets in a 30-30 Winchester Model 94, I wrote: "To my way of thinking, a 2 5/8" 5 shot 100 yard group approaches the maximum obtainable jacketed or lead bullet accuracy from a Model 94 30-30 Winchester lever action, especially with iron sights."
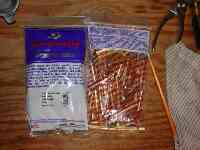
I would need perfect, indexed bullets and perfect, indexed cases. The bullet would be the Lee C309-170-F because Bill liked that bullet and so did I. The cases would be fully prepped Winchester cases because research informed me that Winchester cases were heavier than other brands. Therefore, their internal capacity was less; thus giving non-maximum powder charges higher loading densities than with other brands of cases. A high loading density usually means better accuracy.
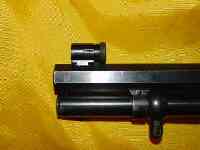
Bill had a Williams 5D peep rear sight, so no replacement was needed there. Here you see the replacement front sight—a Lyman 17AHB Target Front Sight at .404" height. For shooting at round bullseyes while testing loads, I installed the smallest, round insert that came with the sight. For squeeze-out-the-accuracy groups at square bullseyes, I installed the narrowest post insert. Step 2 = buy new Winchester brass with the same lot #.
Step 3: fully prep the brass—250 cases. This was by far the hardest, most tedious part of the entire process detailed here. Many of the case mouths were slightly dented from banging around various warehouses and delivery trucks so I began by full-length resizing all 250 cases in a Lyman die. I then trimmed the cases with my little Lee hand-held trimmer. I then inside and outside chamfered the case mouths. Then the real prepping began, case preparation steps not usually performed.
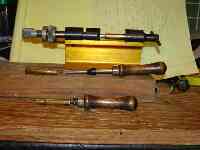 From top to bottom in the photo, see, (1) my Forster trimmer with its neck-turning attachment installed, (2) a Lyman Flash Hole De-burring tool, and (3) a Lyman Primer Pocket Uniforming tool.
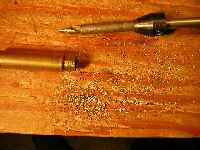
 Uniforming primer pockets probably helps accuracy very little, if any—at least on my lot of cases. The tool removed almost no brass from the primer pockets. After de-burring 250 flash holes, I now consider that step necessary for the preparation of new cases. I de-burred cases at my kitchen table while watching television. I'd twist the tool around inside a case, then turn the case upside down and tap it with my finger, dumping the brass shavings on the linoleum floor between my feet. After a while, I looked down and there between my feet was a little pile of shavings. It looked like a pile of gold dust. About every 3rd flash hole had contained a burr.
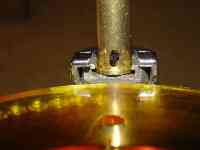
We see a 7mm TCU case on the left and the de-burring tool at top. Note how the tool seats on the case mouth. Needless to say, the cases must be the same length. To adjust the tool, loosen the collar and slide it to the proper position. I adjust it to cut a shallow cone in the top edge of the flash hole.
The 250 cases then fully prepped, i.e., as uniform as humanly possible, I tumbled them for several hours in walnut media. That removed all brass shavings from the cases. I then washed the cases in dishwater and rinsed them in tap water. That removed all traces of walnut media. After drying them overnight, I then sorted the 250 fully prepped cases by 2 Standard Deviations. The results:
I had one final procedure with the 225 good cases. I needed to determine the average usable case capacity, i.e., the inside volume to the base of the neck. Using fired cases, I weighed the cases empty and weighed them again but containing water to the base of their necks. By subtraction, I then determined the weight of the water. As water weighs 15.4 grains per cc, I soon knew the average usable case capacity of my 225 good cases—2.381 cc. Checking some R-P cases I had on hand, their average usable case capacity equaled 2.458 cc. Obviously, my Winchester cases would give higher loading densities. For example and using H4895 with a VMD of .0728, 25 grs of H4895 occupy 1.82 cc. That's a 74% loading density for R-P cases and a 76% loading density for Winchester cases. That doesn't sound like much of a difference, but the cast bullet "experts" say you need at least 75% loading density for target grade accuracy.
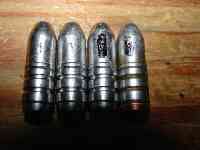
Step 4: cast a batch of hard, near perfect bullets and index them. In order to index them, I opened my Lee C309-170-F mold, and in the center of one of the mold halves, on the nose portion, I etched a scratch with a screwdriver blade. I wanted the scratch deep enough to be visible in bullets cast from the mold, but, yet, not deep enough to affect the bullet's exterior ballistics. I filled my 10 lb Lee pot with hard lead alloy and cast a batch of scratched-nose bullets. After visually sorting them, I had 308 bullets. I then sorted those bullets by 1 Standard Deviation. I used 2 SD for the brass and 1 SD for the bullet because the brass needs to be uniform and the bullet needs to be extremely uniform. The bullet results:
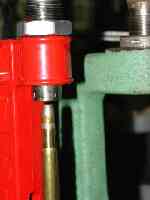
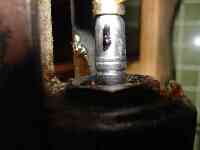
Note that I adjust the 450 so the bullet's crimping groove fills with lube and a little lube oozes onto the bullet's nose.
With gas checks and lube, ready to load, the bullet's average weight = 172.16 grs. Cases fully prepped and sorted and indexed and bullets cast and sorted and indexed, it was time to start loading. Step 5: loading uniform, indexed cases with extremely uniform, indexed bullets. I neck size my fired 30-30 cases in a Lee Loader tool. Believe it or not, I use a very thin smear of Junior Lube as outside neck lube. It works like a charm. To size the cases, I align the index mark on a case with an index mark on the Lee tool's sizing die, then whack the case on the head with a brass hammer, driving it into the die and sizing only the neck. As the case neck is then perfectly round on the outside, and we know from the work of the Forster neck-turning tool that no case neck is perfect, the inside of the squeezed-down neck is now imperfectly round, i.e., out of round. That would cause non-uniform bullet pull and inaccuracy. To alleviate that problem, I then run the cases into a Lyman sizing die just enough for the .308" diameter and perfectly round expander ball to traverse down the entire neck and back up the entire neck, making it perfectly round on the inside. Yes, I know I could buy a neck sizing die with a .308" expander ball, but the combination of Lee die and Lyman die works for me. I ain't messin' with success.
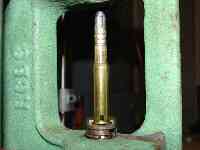
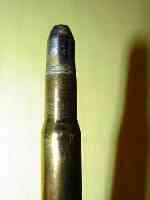 Here we see the final step in the reloading for optimum accuracy process—an indexed bullet seated in an indexed case and crimped with a Lee Factory Crimp Die. Note the crimp far below the bullet's crimping groove. Lee's Factory Crimp Die is one of the better products in a line of better products. Jacketed or lead, channelure or no channelure, it'll crimp a case mouth into a bullet anywhere you want.
 In the case of this case—and for accuracy— I put the crimp low so the forward band, the driving band, just enters Bill's lands. It seats with slight thumb pressure or with almost imperceptible force from the lever. I chamber these target rounds by hand, but they feed through Bill's action just fine. The C.O.A.L. is 2.580" vs the standard 2.550". If you'll look closely at the above photo in the full size version, you'll notice a narrow, ring-like band of brass removed midway of the neck by the Forster tool. This case didn't have much of a thick side, but this side was thicker. There are three keys to accuracy: (1) uniformity, (2) uniformity, and, (3) uniformity. Here's an accuracy step seldom mentioned: using cases fired the exact same number of times—firing uniformity.
In a few years when I'm working on bucket fired (20) or so and I start getting split necks, I'll junk all the cases and start over with my stashed 250 new ones. Step 6: let's shoot groups!
So, do you see what we have here? We have indexed cases loaded with indexed bullets, and with both case and bullet indexed to each other and indexed to the rifle's chamber. Indexed X 4 = uniformity X 4 = accuracy². And at the heart of every loaded round is a powder selected on the basis of a 75 % loading density with medium velocity cast bullet loads.
The target was a black, 2" square a few inches up and to the left. To shoot the group, I used a flat, .050"-wide post-type Lyman 17A insert, and I aligned it slightly below the flat bottom of the square bullseye. Then I slowly raised the barrel until the sliver of white between the black, flat target and the black, flat post disappeared. Then I squeezed Bill's trigger. The load:
Winchester case
The load:
Winchester case I suspect a square bullseye and a post sight insert would have reduced this group at least 1/2". One thing I know—I reached my goal of consistent 5 shot, 100 yard groups of circa 2" using iron sights and lead bullets in a 30-30 Winchester Model 94 lever action. But after looking at the group shot with 25 grs of Varget and my least accurate sight insert and worst target, I'm wondering if consistent circa 1 1/2" groups are possible. If you have a dusty Winchester commemorative with a heavy octagon barrel hanging around your closet, maybe you should let it out. It might be a dandy lead bullet shooter.
|
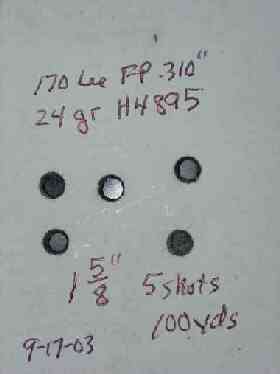 Shown near actual size on the right, see my new accuracy standard for cast bullet, iron sight, 100 yard, 5 shot groups in a 30-30 Winchester Model 94 lever action.
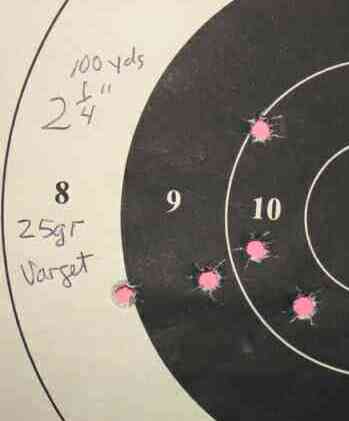 Here's another group near actual size and shot after I ran out of H4895. This group was shot using an aperture-type, .093"-diameter insert.