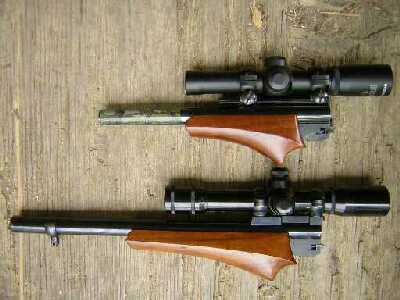
 On the top right see my Contender 10" bull barrel 7mm TCU. Below it see my Contender 14" bull barrel 7mm TCU.
 I never liked hunting with the 14" barrel due to its awkward weight-forward handling. But the 10" barrel handled naturally and easily. After hunting with it during the 2011-2012 season, I started looking for a 10" bull barrel in 30-30. Why 30-30? Well, I had 14, 30 caliber bullet molds. I had several boxes of ammo loaded for my 30-30 Model 94 Winchester rifles. Plus, I had thousands of 30 caliber cast bullets in every stage from as-cast to Ready To Load. But let's face facts—mainly, I wanted a 30-30 barrel for my Contender. I wanted a 10" bull barrel like my 10" 7mm TCU barrel, and I wanted it set up exactly the same. I liked hunting with the 10" bull barrel and 2X scope. So I found one in 30-30, used but like new. When it arrived, I left the iron sights on it and started running rifle loads through it and over my Chrony. My 20" barrel, rifle-load deer hunting bullets were the Lyman 311041 @ 178 grs, the Ranch Dog TLC311-165-RF @ 176 grs and the RCBS 30-180-FN @ 195 grs—all in acww alloy and twice-lubed with Lee Liquid Alox and Lee push-through sized .309". The 20" and 10" velocities with the same loads were:
Through the scope-less 10" bull barrel, the RCBS 30-180-FN load kicked hard—too hard for me. It certainly wasn't a load I'd want to use on a beer can unless the can was in the mouth of a bear. No, I would deer hunt with the other bullets. With them, subsequent heavier loads using Varget increased the 10" barrel velocities to 311041 = 1686 fps and TLC311-165-RF = 1729 fps. Those recoil levels were tolerable. Increasing the pistol's weight with a scope would make them even more tolerable. So for the 30-30 barrel, I ordered a 2X Burris pistol scope and a Weaver 92A scope mount, both exactly like on my 10" 7mm TCU barrel. (Except for the "Made in the Philippines" sticker on the new scope.) For rings, I ordered Leupold PRW steel rings # 54149 Medium Matte. They would be heavier than the aluminum rings on my 10" 7mm TCU barrel and, therefore, help decrease the recoil level. (Note: 2-25-13: They would also increase the recoil stress on the scope mount as you will see later in this article.)
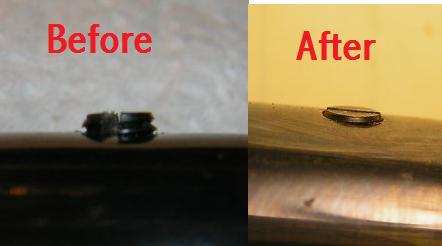
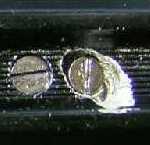
First step, I removed the iron sights from the 30-30 barrel. The six screw holes in the barrel were clogged with thread locker, so I spent several minutes cleaning them. Then I installed 6-48 slotted plug screws in the two front sight holes. The rearward plug screw fit flush, but as you can see in the "Before" and "After" photo of the front screw, it stuck up a lot, probably due to the slight taper of the barrel.
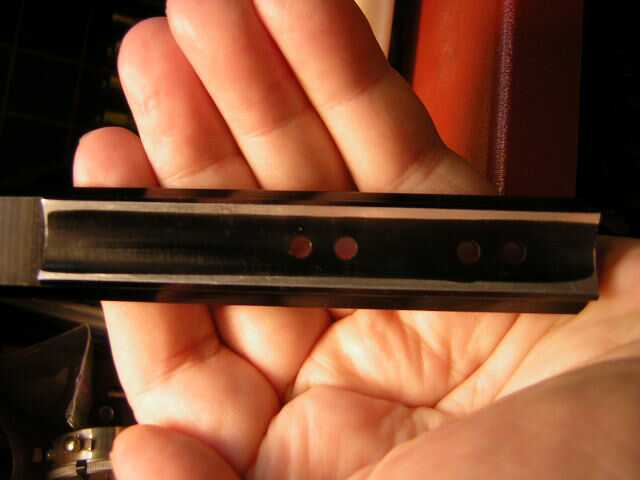
I easily shortened it with a file and one of the screw shortening jigs I sell here. This photo shows the front of the jig and not the rear with the paint scraped off by several files over several years. It has a 6-40 hole, a 6-48 hole as you see here, and an 8-40 hole. This jig has shortened dozens of screws and plug screws. You see the shortened 6-48 slotted plug screw on the left and a new one on the right.
Next I turned my attention to the four scope mount holes. The factory tapping job had left little rims around the holes much like tiny bomb craters. As I wanted perfect mating of mount to barrel, I used a file on the hole rims and made them level with the surface of the barrel. My intentions were to glue those mating surfaces together with a very thin layer of epoxy. I wanted a tight fit. The 195 gr RCBS load kicked. Kick = recoil = loose scope mount potential. By golly, this scope wasn't shooting loose!
As I couldn't capture the sliver of light with my camera I drew it in with a "Paint" program. If you'll notice, the gap is about 3/4 the size of a 30-30 case rim. The mount, the proper Weaver 92A, would have perfectly fit the curvature of a barrel smaller in diameter than my .804" diameter 10" bull barrel. It was made as a one size fits both Contender barrels and Rossi single shot barrels. It would not work on an application called, "By golly, this scope wasn't shooting loose!" Hand cannon shooters take note! I stopped the mount installation process and pondered my options. Option #1 = fill the gap with epoxy; option #2 = make it fit. I chose the latter.
I took a piece of emery cloth, wrapped it around the barrel, then began sanding the aluminum mount bottom to perfectly fit the top of the steel barrel. Yes, this process scratched the barrel bluing a little. As the aluminum mount was much harder than expected, the process took about thirty minutes, maybe more. I used "Fine Grit" emery cloth, but I think "Coarse Grit" would have worked better and faster. Update 3-21-13: Use the shank of a long 3/4" bolt instead of your barrel. The thickness of the coarse emery cloth added to the bolt diameter almost perfectly matches the barrel diameter.
Here's a look at the bottom of the mount just before I stopped sanding. I stopped sanding when the emery cloth started scratching the inside center of the mount.
Finally, a check showed this—a perfect fit of surface to surface. There was no to almost no sliver of light between mount and barrel. With a thin layer of epoxy between the mount and the barrel, I had a recoil proof scope mount—or so I thought�.
Notice the gap in this picture vs no gap in the picture above it. You can see it clearly in the full size photos. Something was wrong, obviously. I fiddled with the mount atop the barrel. My finger over the mount's rear ring slot, the gap disappeared. My finger over its front ring slot, the gap appeared. The reason hit me—the barrel tapered starting just past the forward screw holes. The mount moved up and down like a seesaw with its fulcrum just past the forward screw holes. Due to Newton's first law of motion about an object at rest wanting to stay at rest, the pistol recoils backward and the scope effectively recoils forward in relation to the pistol. The result is downward recoil force on the front scope ring and upward recoil force on the mount screws. As the front scope ring is supported only by the aluminum mount and with a gap beneath the mount, the effect is like the recoil force of every shot hitting the top of the front ring with a hammer. In other words, a loose mount is inevitable without filling in the gap.
The white arrows show the recoil force on the pistol, bottom, and the effective recoil force on the scope, top. Imagine the stress on the scope mount screws in the expected forward direction and in the unexpected upward direction. Without eliminating the seesaw fulcrum shown here, i.e., filling the gap beneath the front scope ring, this scope would eventually shoot loose.
Here we see the final results—a recoil proof T-C Contender scope mount. Click for the full-size version and you can see where epoxy has oozed from beneath the mount. Not shown, and of more importance, is the epoxy which has oozed from beneath the mount's front, non-elevated edge. I also assigned each of the four mount screws their own hole in the mount/barrel. Prior to smearing a thin layer of epoxy between the mount and barrel, one by one I tightened each screw through its hole in the mount and made sure it did not bottom out in the hole and leave the mount loose. I wanted no surprises like I recently encountered with partially-tapped old Redfield rings.
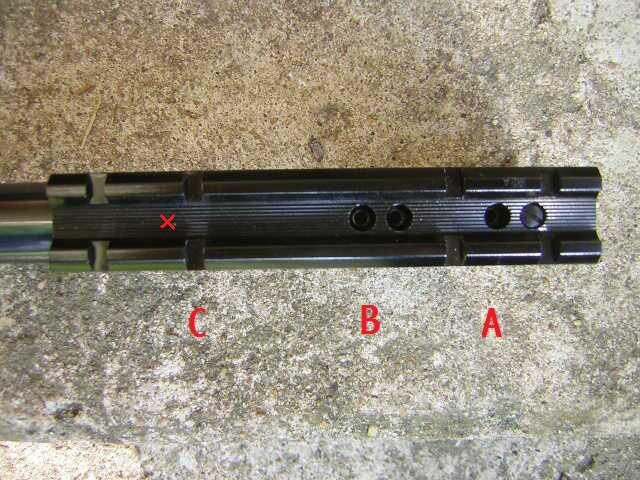
Muzzle to the left, A & B mark the mount screws. C marks the mount slot against which the front PRW ring locks. The fulcrum lies just to the left of B. Just left of the C slot at the red X, I wish I had drilled and tapped a hole and installed a 10-32 x 1/4" hex head set screw. (Sold here.) I would have put Loctite® in the threads and snugged the tip against the barrel through the wet epoxy already there. The circa .025" thick layer of epoxy filling the gap beneath the front of the mount would have had failure insurance. The hex screw would have shared the downward hammer blow-like recoil force.
For those with recoil concerns, like me, here's the Recoil Energy numbers with the three bullets above, average powder weight of 25 grs, and a final total pistol weight of 3.8 lbs.
In conclusion I repeat, Hand cannon shooters take note! Update 7-23-12
There was no screw in hole #3. A previous owner had wallowed out the #3 hole with an electric drill, probably to remove a boogered screw. Screws #1 and #4 were barely hand tight. Screw #2 was tight. The fulcrum effect and years of tightening and retightening loose screws by probably several owners had nearly ruined this mount. It's a miracle none of the 6-48 holes in the barrel weren't stripped. I almost ordered a new mount, but my tinkering instincts took over. So I spent several hours working on this mount and its screws.
Every one of the scope mount screws had boogered heads from repeated tightening and retightening. The threads on all the screws were clogged with rock-hard thread locker, which a stainless steel brush wouldn't completely remove. That and the boogered heads is why I replaced them all. With a pin, I had to clean the thread locker crust from the four tapped holes in the barrel, and I had to chase the threads with a 6-48 bottom tap. Then when I removed the rings from the scope, some sort of sticky tape was on the inside of both rings. All this on a low-kick 222 Rem! The previous owners of this Contender barrel probably scratched their heads in wonder of why the scope on a pussycat 222 Rem kept shooting loose. You and I know the reason—the fulcrum effect. The Recoil Energy of this 222 Rem is only ~ 5 ft/lbs. If over the years it almost demolished a scope mount due to the fulcrum effect, what does the mount on your 44 magnum look like? I repeat, Hand cannon shooters take note! If the scope on your Contender changes zero or shoots loose, you probably have a fulcrum problem.
Update 11-13-12
I used a new 92A Weaver mount, and it required lots of emery cloth work. I also used an old set of Weaver clamp-on rings from my junk drawer. The picture below shows the old rings mounted and tightened down. I replaced the 4 original 6-40 x 5/16" Fillister head ring screws with 4, 6-40 x 1/2" T-10 Torx Fillister head screws for recoil insurance. (Sold here) That required cleaning out all 4 tapped ring screw holes with a 6-40 bottom tap. (Sold here.)
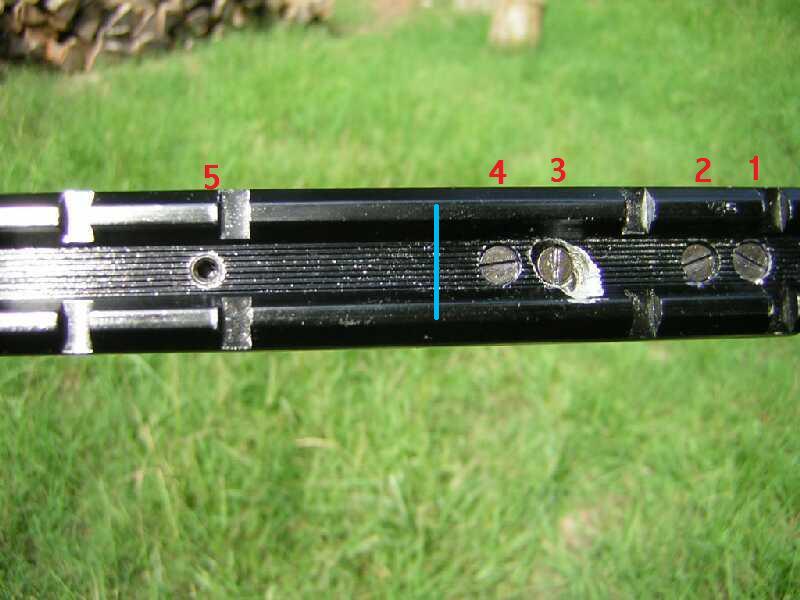
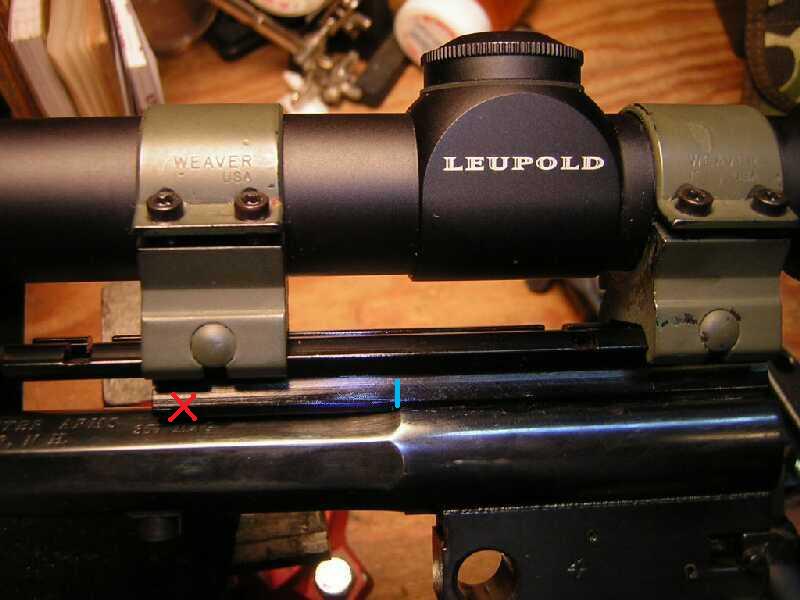
The red X marks where I installed a fulcrum effect stopping 10-32 x 5/16" set screw through the Weaver mount and touching the octagon barrel. The smaller diameter octagon barrel necessitated using a 5/16" set screw instead of a 1/4" like on the bull barrel above.
The blue line marks the fulcrum point. It's easily visible without the blue line because Not visible is the 4, 6-48 T-10 Torx Weaver head screws I used to install the 92A mount. That step wasn't easy and probably wasn't necessary. But the added torque plus the extra thread purchase gained via perfectly fit-to-length screws made the work worthwhile, I believe. As I did with the two mounts above in this article, I assigned each of the four mount screws their own hole in the mount/barrel. Only these 4 mount screws were Torx screws.
Notice the tapered tip of the slotted head screw. The tip is tapered for an easy start in a hole, but the taper removed about one full thread. A screw in a hand cannon barrel needs all the threads it can get. I used a screw jig, a micrometer and a file, and one by one I shortened each Torx screw for a perfect flat-tip fit in its own hole. When a screw seated deep enough that the mount didn't wiggle, I filed an extra .004" off the screw. That gave each screw about 1/4 turn bottom-out clearance. As mentioned above, align the removed screws somehow so you can positively put each screw back in its own mount/barrel hole.
Note: A bottomed out scope mount screw might as well not be there!I spread a thin layer of epoxy on the bottom of the 92A mount, then installed each screw in its own hole, then torqued them down with all the strength in my wrist. This scope isn't shooting loose. The mounts for sale below were altered for recoil resistance as described in the article above. They are as recoil resistant as possible without going to high-$ 6-hole mounts and drilling & tapping two extra holes in your barrel. The bottoms were sanded down for a perfect to near-perfect match to a ~.804" diameter Contender barrel contour. Then a fulcrum effect stopping 10-32 set screw was installed near the front of the mount.
Detailed Instructions
1. Important! Make sure the four 6-48 mount screws do NOT bottom out in your barrel as described in the article above! 2. De-oil your Contender barrel in the scope mount area. I use rubbing alcohol. Consider this installation as permanent! 3. Put a VERY THIN smear of epoxy on the bottom rear half of the mount in the area which touches the barrel behind the fulcrum point. DO NOT get epoxy close to the 6-48 holes. 4. Put thread locker on the 6-48 mount screws and install the mount on your barrel. 5. Put a touch of epoxy on the 10-32 set screw threads and snug it against your barrel after the four 6-48 mount screws are tightened. I said snug and after! Do not tighten the 10-32 set screw! Snug it! 6. Wait 24 hours and install your scope. Choose both scope and rings for light weight. Push the ring recoil lugs forward against the front of the mount slots, not back against the rear of the slots! 7. If you perform the installation correctly and your mount shoots loose, return it to me for a 100% refund of the $25 purchase price.
Parts & Tools List
Except for #1 all items are sold on this site here and here.
|
 My scope stuff finally arrived.
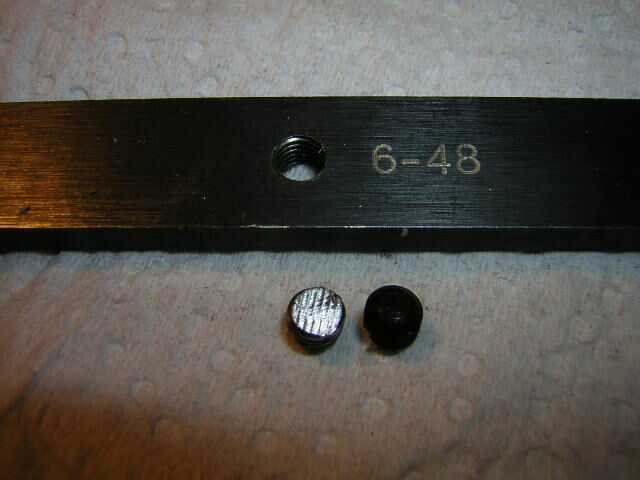
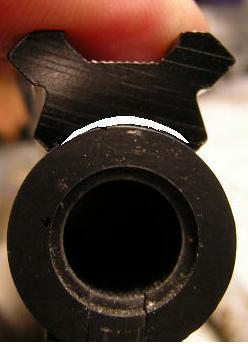 The barrel finally nice and smooth around the scope mount holes, I placed the mount in position on top of the barrel. I then held it up to a light and looked at the mount/barrel junction to see if maybe I'd missed a crater rim. Lo and behold the sight on the right greeted me. It was an Oh, Shiite! moment.
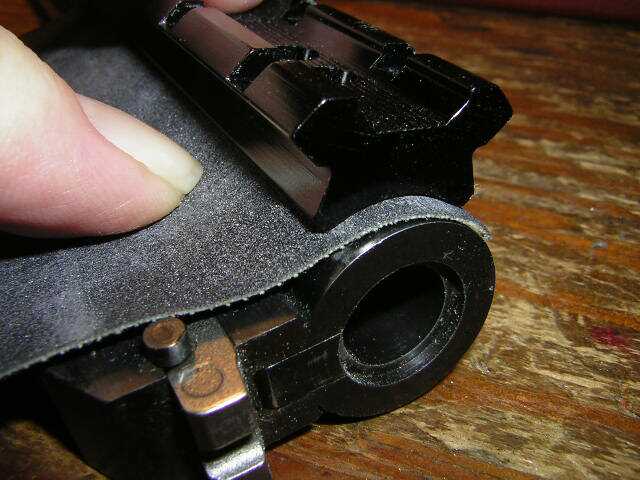

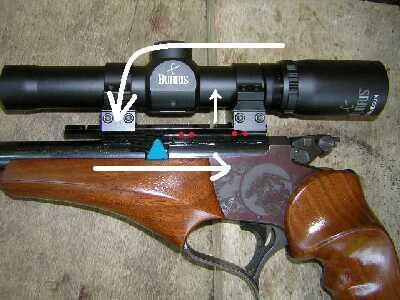 Here's a "Paint" picture for a better explanation. The red dots represent the mount screw holes. The blue triangle is the seesaw fulcrum, i.e., it's the point where the barrel taper starts. Beneath the front scope ring, the barrel diameter is .786" vs .804" beneath the rear scope ring.
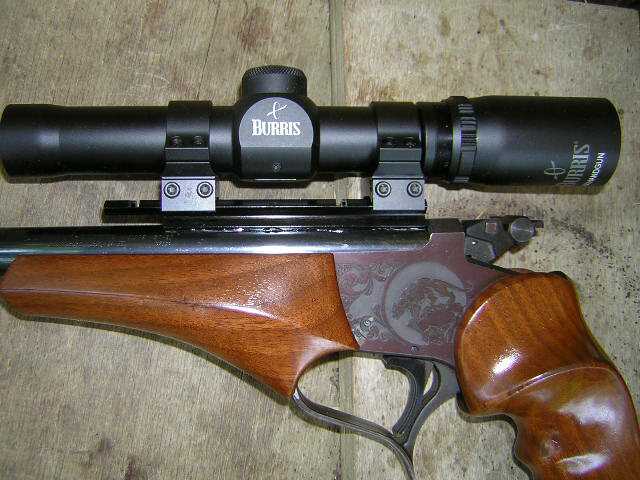
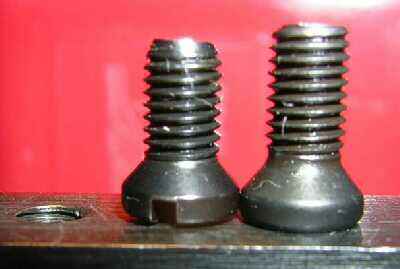 Sitting on a screw shortening jig and on the left in this photo, see one of the slotted Weaver 6-48 x 3/16" screws which came with the 92A mount. On the right see a new T-10 Torx Weaver 6-48 x 1/4" screw like the ones I shortened and used to install the mount.