Copyright 2008 by Junior Doughty
Click here for article #2 on the Mosin-Nagant Rain Rifle
Click thumbnails for full size photos
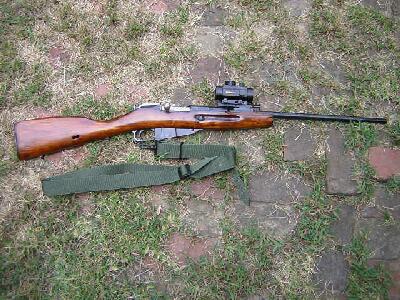
Here's the butchered M44 Mosin-Nagant I christened the "Rain Rifle."
The red dot sight even passed the downpour test to my surprise. But I never liked the way the red dot sight looked on the rifle, and I didn't like the idea of depending on a battery.
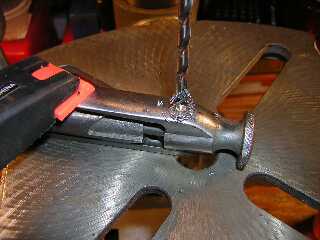
I almost bought another Leupold 2.5x28 IER for the Rain Rifle. But by then, and after passing the downpour test so well, the Rain Rifle concept had also become the Hell or High Water Rifle concept. Fragile optics didn't belong on such a rifle, in my opinion. I decided to go with a peep rear and a Fire Sight front. I spent a week or so trying to think of a way to inexpensively fit a peep rear sight to a Mosin-Nagant. Then one day while holding the rifle and pondering peep sights, I looked at the rifle's Uncle Mike's swivel stud saddle ring. The hole through it was about the same diameter as the .150" Williams apertures I liked so well on hunting peep sights. Hummm. . . . The ol' brain got to thinking a swivel stud could become a peep sight. A search through my junk box produced a 7/8" machine screw Uncle Mike's swivel stud. (You can buy one stud here.) I decided to install the swivel stud/sight on the cocking piece. It was the most convenient spot, and it put the aperture close to my eye, which would also give a large sight radius. By cocking and re-cocking the bolt many times, I discovered that the cocking piece returned to the same position every time or so close it wouldn't matter.
With the round bottom of the bolt head off the edge of the drill press table, the flat bottom of the bolt's guide bar kept the bolt perpendicular to the drill bit. A clamp kept the bolt in place as you see here. I made sure the hole didn't go through the cocking piece and into the firing pin channel inside it. The hole drilled easily, much easier than I had expected.
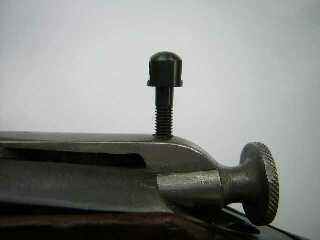
The hole tapped just as easily. Here we see the final results. There's a little more than 3/8" of threads inside the hole. At 32 turns per inch, that's 12+ threads. In other words, there's lots of up and down adjustment in this $2 peep sight.
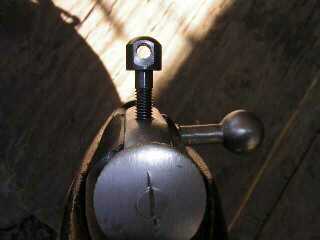
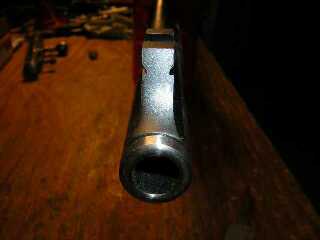
Here's an eyeball view of the final results.
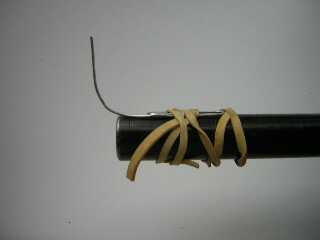
I wanted the sights to align with my aiming eye, not the aiming eye of the average shooter. Throw the rifle to my shoulder, drop my head to the stock, and I'm looking through the aperture and the front sight is centered in it. Perfectly centered. Like you can't buy from a factory. I got that perfect alignment by trial and error. With a school kid's ruler, I measured the approximate distance from the center of the aperture to the center of the firing pin at the rear of the cocking piece like you see in the eyeball-view photo above. Then with the same ruler, I measured the distance from the center of the bore to the top of the redneck sight height test instrument. I simply bent the paperclip up or down until its height closely matched that of the rear aperture. Then I quickly raised the rifle like Mossy Horns had stepped out of a thicket, and I just as quickly aimed.
Next step was to determine the proper ramp and Fire Sight heights to give me approximately 1 1/16" from the center of the bore to the center of the Fire Sight bead. I already knew I wanted a Williams Streamlined ramp due to its slot for a Fire Sight hood. I decided on a 9/16" Streamlined Ramp and a .343N Fire Sight. From Brownells, the parts were:
While awaiting the parts, I removed the military rear sight base from the rifle barrel. I did that to rid the rifle of a little extra weight. The front sight & bayonet bracket retaining pin had required much effort to remove while the bracket itself came off with one tap of a small hammer. In the case of the rear sight base, the pin flew out with just a tap from a small hammer. The base, however, didn't budge after many taps from the same hammer. So I got a bigger hammer, a carpenter's hammer. Same thing. So I got an even bigger hammer—a 2 lb sledge hammer. After a few whacks, the base finally moved and came off the barrel. It weighed 1.9 oz, and I'm not sure the weight saved was worth the effort required.
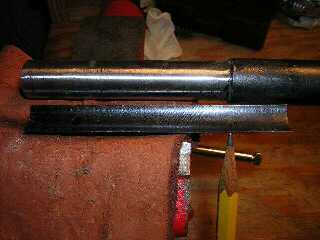
The photo shows a pencil marking the location of the hacksaw cut. After using a file to remove sharp edges left by the hacksaw job, I took the barrel and the bottom of the ramp down to bare metal. I used a belt sander on the barrel and a Dremel® tool sanding disk on the bottom of the ramp.
The barrel measures .568" inches in diameter, and a Williams Gunsight tech man said the ramp would fit barrels from .625" to .675" in diameter. This fit looks good to me! Now came another time out for thinking. Somehow I had to find a way to solder the ramp in place and align it with the barrel and the rear peep. If it ended up out of alignment, the Fire Sight might stick out to one side or the other when the rifle was zeroed. I finally decided to use the ol' redneck eyeball measuring device.
Fire up the torch!I dripped Comet Flux on a cotton swab and applied it to the barrel and the bottom of the ramp. I clamped the ramp upsidedown in a pair of vice grip pliers. As the Brownells solder instructions said to do, I heated the ramp until it, not the torch flame, melted the solder. Some of the surface "tinned." However, mostly the solder formed beads. I installed the bolt into the unloaded barreled action and left the bolt cocked. Then I clamped the barrel, about mid-barrel, in my bench vise. I positioned the barrel/vise so that (1) I had room to work on the end of the barrel; and (2) I could scoot my chair backward several feet and could eyeball down the unloaded barrel and see the alignment between the top of the ramp, the barrel, and the rear sight stud/peep at the other end of the barreled action. If the rifle zeroed with the Fire Sight halfway out of the ramp groove to one side or the other, I'd just heat the barrel/ramp area, melt the solder, then turn the ramp in the direction needed. So, plan in hand, I eyeball-aligned the rear stud/peep into a verticle position. Then I tinned/beaded solder onto the top of the barrel. Next, I placed the tinned/beaded ramp onto the barrel. Then I started heating them both, moving the torch flame from one side, underneath, to the other side, back again, etc., etc. The beads melted ok, but when the eyeball alignment instrument showed the ramp turned in one direction or the other, i.e, out of alignment with the barrel and the peep, I had trouble getting it straight. In trying to move it ever so slightly, I knocked it off the barrel several times. In frustration, I wished for the clamp the Brownells instructions said I should use but which I could not find in the junk around my work bench. Finally, the ol' eyeball measuring device saw the top of the ramp, the barrel, and the rear stud/peep in what looked like perfect alignment. Later when I zeroed the rifle, the Fire Sight stuck out to the left of the ramp exactly .030". That's where she'll stay!
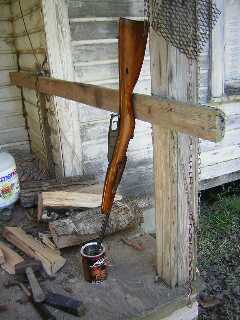
I filled a coffee can with hot tap water and stuck the rifle's muzzle down in it as you see in this photo. I left it there for 30 minutes. When I removed it, the water had turned a light brown, like very weak tea.
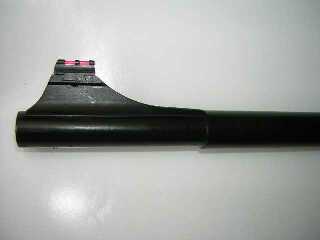
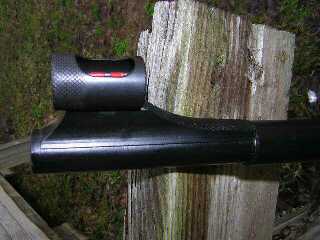
Now, I had to remove the water from the rifle. I wiped off the barrel and ramp, and I ran a couple of dry patches through the bore. To remove the water from under the ramp, I turned on a burner of my gas kitchen stove, and I held the muzzle end of the rifle over the flame, turning it and pulling it back and forth over the flame in order to heat it evenly. When the barrel and ramp became too hot to touch comfortably, I turned off the flame. Both barrel and ramp were 100% free of moisture. Bolt removed, I placed the rifle muzzle up and let the chimney effect cool it. About an hour later, I gave it a coat of flat black spray-on paint, then ran an oiled patch down the bore. Here's the results after installing the Fire Sight. Notice how well the cut-off ramp matches the step in the barrel. Like I said, the Fire Sight sticks out on this side exactly .030" with the rifle zeroed. It's barely noticeable. In my opinion, that's pretty darn good eyeball alignment! Notice the three little black rings holding the fiber optic rod to the sight. Beneath the center ring there's a hole in the ramp down through which you can install a screw provided with the ramp. You'd have to drill & tap the barrel, of course. That's not so dangerous with this rifle—it's counterbored. The counterbore extends a little rearward past the ring on the right. Had my solder job not held, I planned to drill the screw hole all the way through the barrel. After tapping, I'd keep shortening the screw until it didn't protrude inside the barrel. I don't think it would have hurt a thing. Here we see the Fire Sight hood installed. I'm proud of the way this ramp and sight installation turned out. I had planned to leave the hood on the ramp even when hunting, but the bead of the .343" Fire Sight centered high in the circle of the hood. When aiming, my eye tended to center the hood in the rear aperture and not the sight bead. The bead then became high. So I'll pull the hood off when I enter the woods and stick it in my pocket.
Here's a distance shot of the swivel stud peep sight against a white background.
This is also a good view of the swivel stud saddle ring which sparked this project.
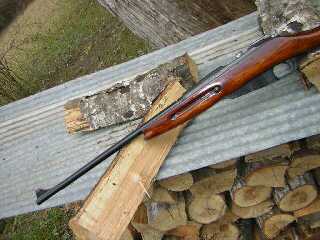
Here we see the final results. With the bolt cocked, the sight radius is 26" which is a lot. One half turn of the swivel stud peep gives about a 2" POI change at 100 yards. Notice the Uncle Mike's wood screw swivel stud epoxied in the cleaning rod hole in the cut off forearm tip. As you see the rifle here, it weighs exactly 7 lbs 1.6 oz. That's light. I like this Rain Rifle or Hell or High Water Rifle. It'll see the woods a lot even if it's not raining. The advantage of custom sights tuned to the shooter's aiming eye is a big one. Ol' Mossy Horns doesn't stand a chance.
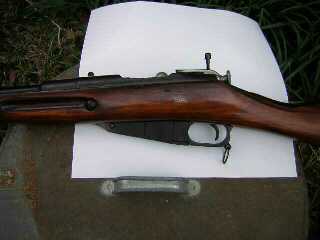
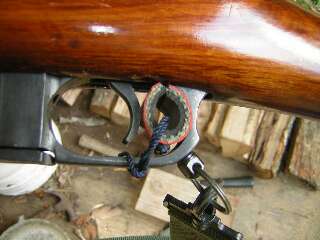
The piece of air hose cut for a jam-fit behind the trigger is my redneck trigger-block safety. The fit is so tight I can squeeze the trigger with all my might, and the rifle won't fire. I use it only in the woods. To operate it, I push it out from behind the trigger with my finger. It's a free trigger-block safety. Use at your own risk.
|
