Copyright 2012 by Junior Doughty
Click here for article #1 on the Mosin-Nagant Rain Rifle
Click thumbnails for full size photos
Improving means:
 This project began while re-reading the Rain Rifle Article #1 and noticing how shiny the Rain Rifle's stock looked in the photo on the right. A deer could see that shine for hundreds of yards. The shiny Russian finish had often bothered me while hunting. Now that hunting season was over, I had time to replace shiny with dull. I like an oil finish, and I had on hand a can of Boiled Linseed Oil (BLO) which I had used on several gun stocks and knife handles.
A gun forum member suggested simply scraping off the old finish with a dull pocket knife. As his method was by far the easiest of many suggestions—some expensive and complicated to the max—I tried it. It worked. Here you see the results of my first minute of pocket knife Russian finish removal. I put the blade mostly perpendicular to the stock and scraped gently. Off came the shellac.
The stock clean, I ran a piece of rough sandpaper over it to:
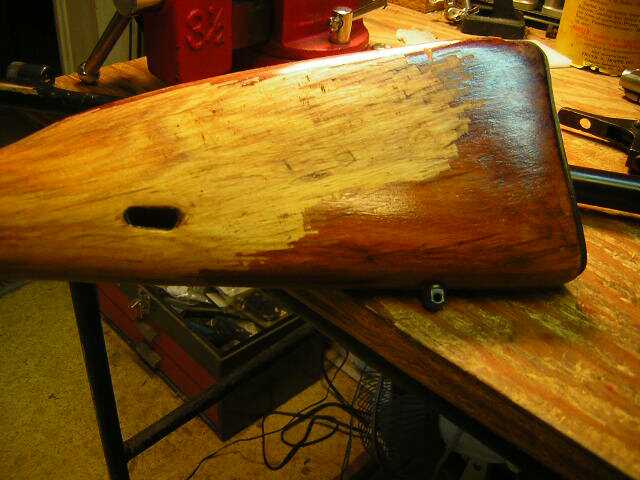
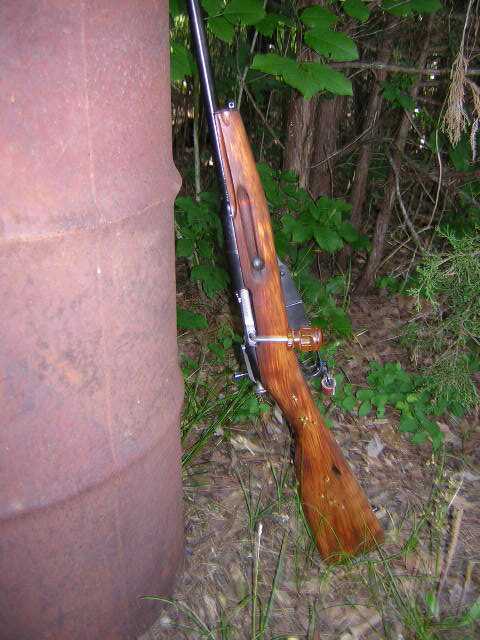
Here's "After." This photo, by the way, was taken with the stock in direct sunlight for maximum shine possibilities. Plain as day, there is no shine. This is after several rubbed-in applications of BLO. I simply wet a rag with BLO and rubbed it in. I did that 3 or 4 times over an afternoon and a couple of more times the next day. Warning: Dried linseed oil on a rag has burned down many shops and houses! The rag greatly increases the surface area, allowing more oxygen to reach the dried oil—spontaneous combustion potential to the max! By the way, I was told that plain ol' BLO wouldn't repel water. Rain on my Rain Rifle would quickly soak into the stock. It would swell, bust and splinter. I needed wax over the BLO coats. I needed other expensive and complicated coatings…. Wrong, as you'll see later.
Changing The Bolt And Bolt KnobI didn't know I needed a new bolt handle on my Rain Rifle until I read posts by member KCSO on the Castboolits forum. KCSO makes and installs new and inexpensive Mosin-Nagant bolt handles for scope use.Well, I didn't need a new handle for scope use—I liked my $2 peep sight just fine—but someone pointed out that KCSO's long bolt handle increased chambering leverage. Now that would help chamber those tapered-rim Russian 7.62 x 54R rounds, especially in a hurry! As I had previously replaced the bolt handle on my Turk Mauser with a 1/4" hardware store bolt, a new Mosin-Nagant bolt handle seemed possible with my limited skills. I had soldered in the new hardware store bolt on the Turk, and I had suspected J-B Weld would work as well and much easier. So that became the plan:
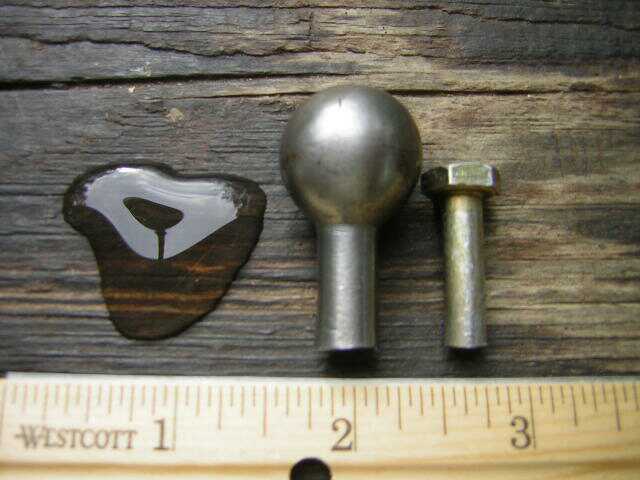
 So the plan became action. Here we see a 1/4" x 4 1/2" x 28TPI Grade #8 hardware store bolt. The cost = 33˘. I could have used a 20TPI bolt but the extra 8 threads would give more bite for the J-B Weld. I needed all the bite I could get because other naysayers had said the J-B Weld wouldn't hold.
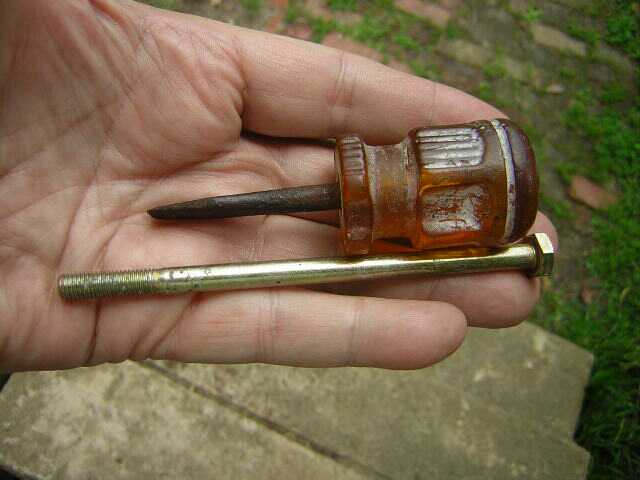
 New bolt knob selection was a long process. All I knew was I didn't want another deer antler knob. But I wanted something just as cool. After a couple of days of knob-idea rejections I happened to pick up a screwdriver from my bench. Its handle would work, I decided, but it had a low cool factor and was a little too long. But wait, I considered. A plastic screwdriver handle would work great with wet gloves in a rainstorm, for which the Rain Rifle was designed. I searched through my father's junk drawer and found the ancient stubby screwdriver you see here. The short handle came equipped with grip groves and notches, all designed for slip-proof use. Soaking wet with water—or even grease!—it was the perfect non-slip handle for a Rain Rifle bolt. I propped the screwdriver you see above over a kitchen stove burner and rested just the blade tip in the flame. A minute or two later, a pair of pliers easily pulled the blade out of the handle, leaving an irregularly shaped circa 1/4" diameter hole inside the handle. When the plastic handle cooled, I used a 1/4" x 28 bottom tap and tapped the plastic hole. The 1" of threads you see on the bolt above turned nicely into the threaded hole and stopped with no threads visible. Epoxy applied later to the threaded hole would make the hardware store bolt and the junk drawer screwdriver handle an inseparable unit.
Hacksaw Time!
The hacksaw easily removed the too-short Russian handle.
The hacksaw work left a short hump on the rifle bolt flat edge, so I spent a few minutes with a file leveling the hump and removing sharp edges.
I then guesstimated the center of the little hump and carefully dimpled it with a center punch.
Drill Time!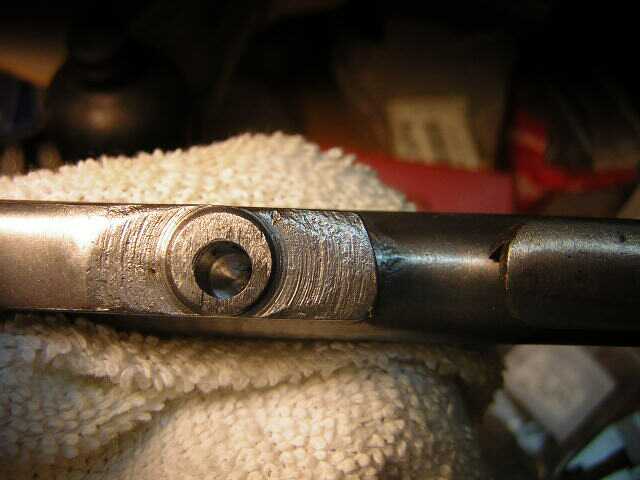 The proper #3 HSS drill quickly drilled a 7/16" deep and .213" wide hole in the Russian steel. I picked a depth of 7/16" because it would give me room for 8 or more 28TPI threads. That was also the approximate height of the rectangular bolt hump above the circular bolt body. The proper #3 HSS drill quickly drilled a 7/16" deep and .213" wide hole in the Russian steel. I picked a depth of 7/16" because it would give me room for 8 or more 28TPI threads. That was also the approximate height of the rectangular bolt hump above the circular bolt body. Again I was amazed at the sharpness of the inexpensive HSS drills I sell here. However, a sharp bit can't correct a poor guesstimation and/or an amateur drill press operator. To my chagrin, the hole was off-center. I muttered Dirty rackafratcher son of a biscuit eater! or something similar.
Again I was amazed at the sharpness of the inexpensive carbide taps I sell here. But amazement became dismay when, as a check, I threaded the hardware store bolt into the newly tapped hole. On the right is what I saw. The hole was not only off-center, it was drilled at an angle. As Buck Owens sang, Gloom, despair and agony on me..... For a long time I pondered my dumbass drilling job. Hindsight being always 20-20, I think the bolt slipped in my el cheapo drill press vise. I almost gave up on this project and plugged the misdrilled hole. But I decided maybe the drilling mistake would not be obvious when the new bolt handle and knob were installed. Besides, I could buy an entire new-to-me Russian bolt for ~$40 if my final results looked like hell. Onward went the project.
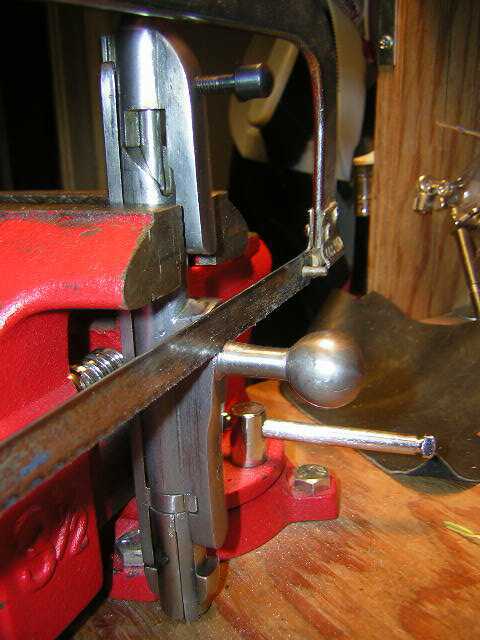
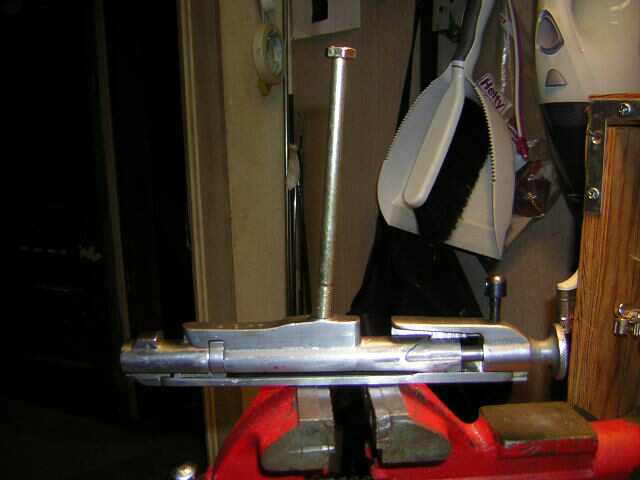
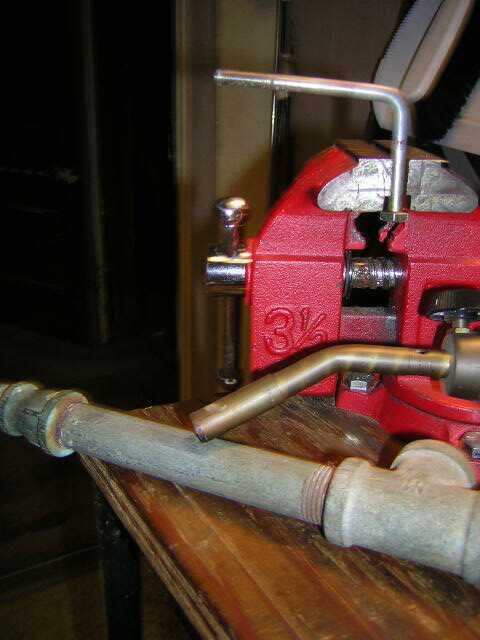
Making A New Bolt HandleStep #1 = bending the hardware store bolt to the approximate correct angle. I didn't want a 90° angle. I left it bent slightly upward.The 1/4" bolt's factory threads, pointing left in the photo, would go inside the new knob. With the propane torch you see here I heated the 1/4" bolt at the desired bend point, about 1/2" above the black mark you see slightly above the vise jaws. All these measurements were made with my calibrated eyeball, which I hoped was better than my drilling skills….. After a minute or two of heating the bend location, I used the galvanized pipe you see as a cheater pipe and easily bent the 1/4" bolt. Step #2 = I hacksawed the hardware store bolt in two at circa 7/8" below the bend center. That would give me, via eyeball measurement, good clearance between the new handle and the wooden rifle stock. It took three times longer to hacksaw this Grade 8 bolt in two than it did to hacksaw off the original much thicker Russian rifle bolt. Obviously, Grade 8 meant hard x 8. That fact should have alerted me to the possibility of difficult threading when it came time to thread the cut-off end of the Grade 8 bolt….. But it didn't. I like to have never got the cut off end threaded. The 1/4" x 28 die I used came from a cheap tap & die set I bought 30+ years ago. I don't know if the problem was a worn die or an unusually hard bolt. Using that 20-20 hindsight, it was both. But just before I gave up and ordered a new die, the old die started cutting threads. Step #3 = make it fit and glue it together.
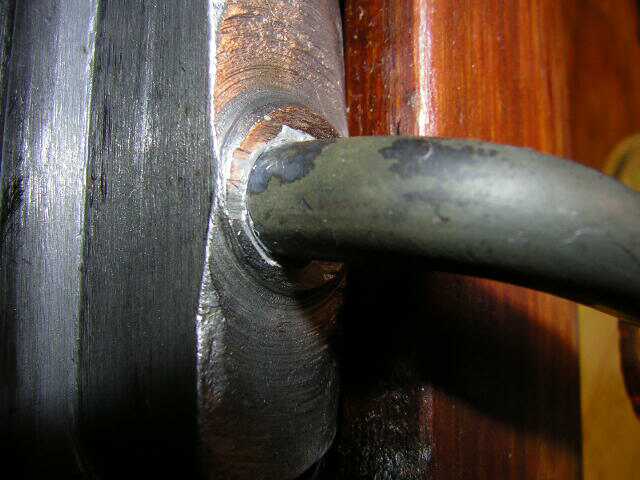
Then I would cut a 1/8 to 1/4 thread and try the bolt for position in the rifle bolt. I stopped cutting threads when the new bolt handle stopped in a slightly back swept position and was tight as in tight. Then I removed the bolt handle and de-greased everything—the rifle bolt, the new bolt handle and the new bolt handle knob. Above you see the new handle J-B Welded firmly in place. It's in there as tight as a man's hand can make it + it's locked tight with J-B Weld.
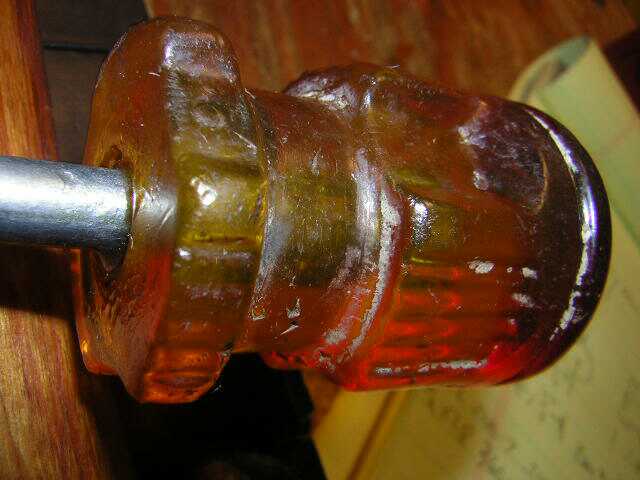
On the right, see the new bolt's new knob firmly epoxied in place. The 1" long metal 28TPI threads go all the way to the end of the original hole in the plastic handle. The only way to remove this knob from those threads is to burn the knob.
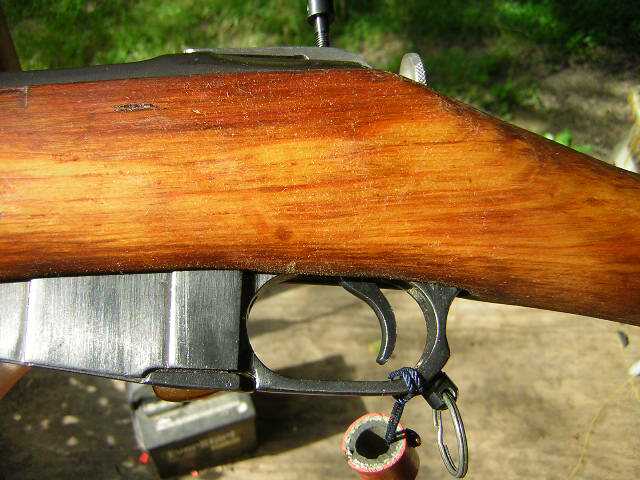
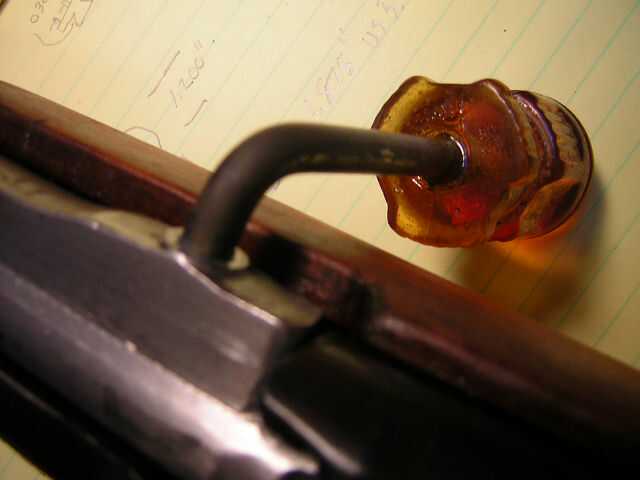
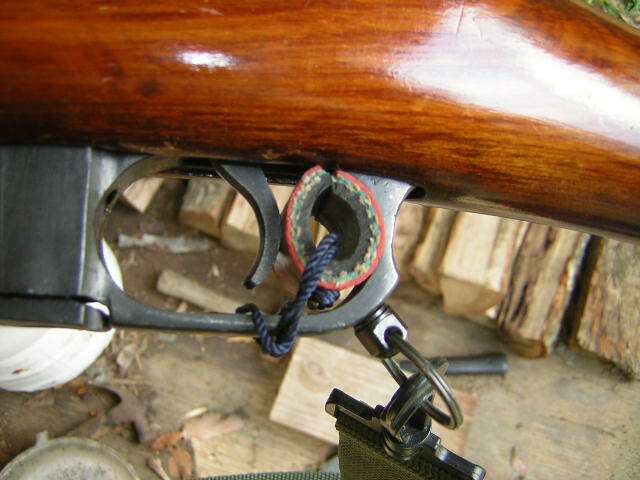
Step #4 = Let the glue dry until the next day. Here's the final results: It is 3 5/8" from the center of the mis-drilled hole in the rifle bolt to the far tip of the new knob. The chambering leverage is now 2x that of the original bolt. Notice the OAL of the new handle with knob is just past the magazine. Not too long and not too short. The new knob is 1.20" in diameter and 1.830" in length. It's a perfect fit in the palm of my hand. Notice the slight back sweep of the new handle. It serves no purpose, but I like it. Notice you can't tell that the now-filled hole in the rifle bolt was drilled off center and at an angle.
Yes, the bolt would now work with a high-mounted over-bore scope. Plus, a new handle could be even lower. The closest proximity of new handle to rifle stock is circa 5/16" just past the bend. The closest proximity of this new handle knob to rifle stock is circa 1/4" at the forward knob bottom edge. I tried with my right hand and I could not bend the handle down enough for the knob to touch the stock. I also put much twist on the new handle to see how well the J-B Weld locked it. It's locked!
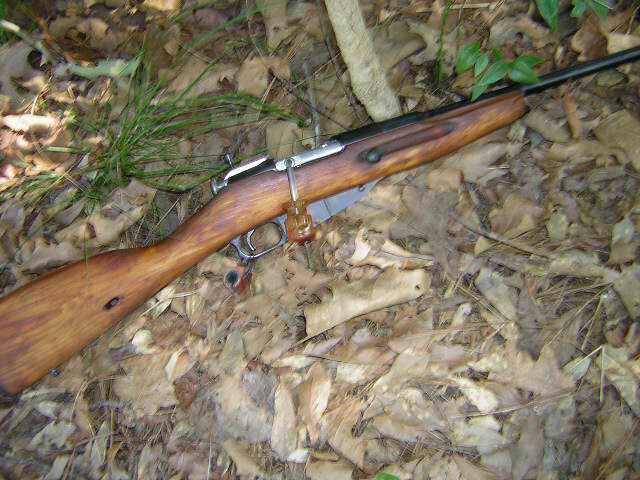
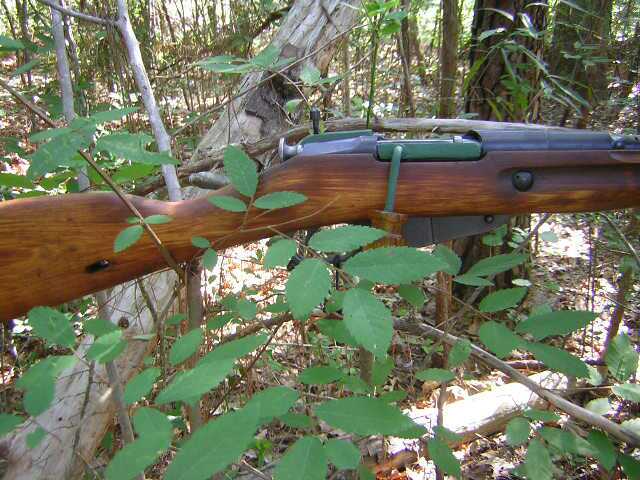
This photo shows the finished rifle in shaded woods. In winter's wet and darker leaves, the rifle would be almost invisible. Note the perfect, palm-size of the new knob. Notice how it blends with the leaves. Note the shiny rifle bolt. That's due a coat of dark paint.
This full-sun photo shows no rifle shine at all—except for that dang bolt.
One last rifle photo. To me, it emphasizes three Rain Rifle points:
UPDATE 5-10-12Amazing what a little paint will do. R.I.P. shiny bolt!This is "FolkArt" artist's "Waterbase" acrylic paint in a little 2 oz bottle from Wal-Mart. I applied 3 coats with a Q-tip. See http://www.plaidonline.com/ UPC = 002899500927 Cost = 97˘ plus tax. The label says it's "927 Old Ivy" color. It looks Olive Drab to me!
UPDATE 5-14-12
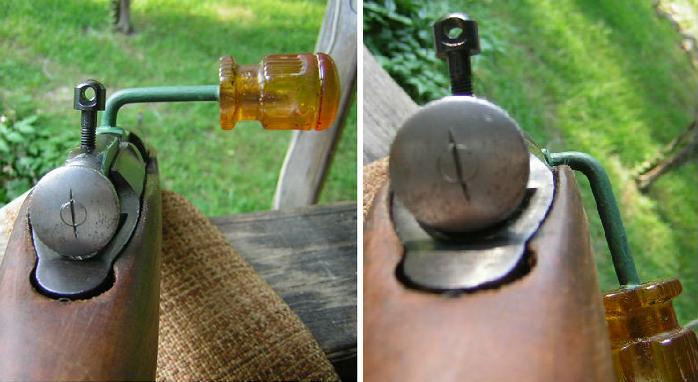
By request, here's a look at the new bolt handle from the rear both open and closed.
From right to left, see the stub of the hardware store bolt, the stub of the original Russian bolt, and a tiny puddle of water. They're all sitting on a big 6"x6"x10" chunk of untreated wood I use as a rest on my shooting bench. I also placed my can of BLO on it when I soused down the Rain Rifle stock with BLO. The dark areas are where splashed/spilled BLO got on the chunk of wood and soaked into it. An hour after I took this photo, the puddle of water looked exactly the same as you see it here. Several hours later, it had evaporated. Not one drop of water soaked through the BLO and into the chunk of wood. Ain't that amazing....
|