Copyright 2007 by Junior Doughty Update here.
|
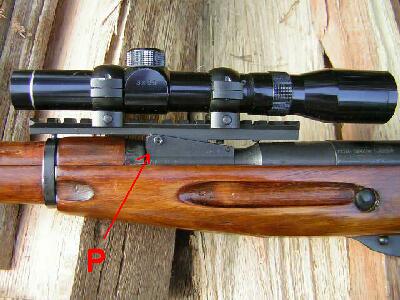
I moved the scope to the very rear of the mount and tried again. The same thing happened—rattle, rattle.
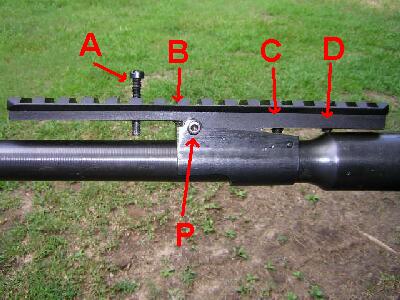
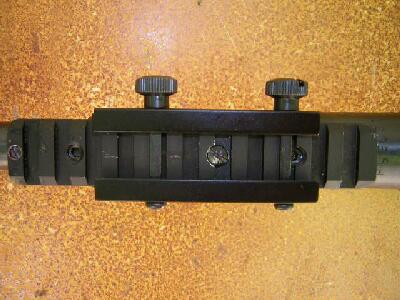
The A screw pushes against the barrel and prevents the mount from twisting. You can see the A screw clearly in the large version of the photo above. I cut the screw off even with the top of the mount and slotted it with a hacksaw.
Note: By filing one side of the mount lug more than the other side, you can align the mount Left & Right with the barrel.
Above, you can also see one of the two rear screws—hereafter known as screw C and screw D. Their function is to push the rear of the mount upwards.
Screws A, B, C, and D all push upwards and force the mount against screws P. Notice there's only about 1/4" between screw B and the Pivot screws P. No way can screw B overcome counterclockwise rotational recoil forces without the help of screw A. Without screw A, recoil twists screws P and pulls screws P upwards. The result = a loose mount. Well, I whacked off the mount in front of screw A and installed a $28 Simmons red dot sight. Three shots later, I could wiggle the mount. (Insert curse word here ____!)
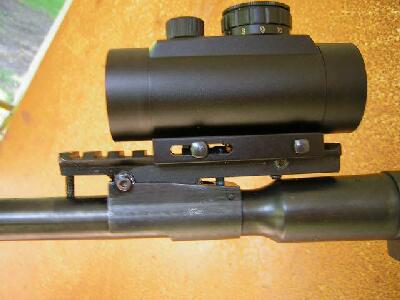
The numbered knob contains the battery and is located at the very top of the sight, i.e., most of the sight's 7.7 oz mass is way above the center of the sight. Plus, it's almost 3 1/2" from the top of the battery box to the centerline of the rifle bore. At recoil, the rifle moved to the right and the sight, top heavy and with lots of leverage, twisted counterclockwise—probably bending the mount momentarily and moving screws C and D up and off the barrel. Look closely above and you'll notice that the metric ~1/4" diameter Chinese screw C is now an American 8-40 screw. It is clearanced through the mount and is drilled and tapped into the military rear sight. It now prevents the rear of the mount from moving upwards. Notice also that I've provided screw D with an 8-40 locking set screw on this side in addition to the Chinese supplied locking set screw on the other side. Maybe 100 heavy loads later, this mount hasn't even wiggled.
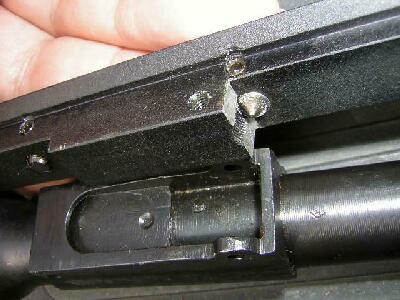
Notice how I carefully placed the sight base's lugs against the mount's lugs so recoil would push lug against lug, preventing movement of the base/sight. Remember: the rifle recoils/moves to the right in this photo; the scope wants to stay still. At the far left, see screw A and its hacksawed screwdriver blade slot. Near the center, notice how 8-40 screw C is countersunk into the surface of the mount. I did that (a) to let the fillister screw head clear the edge of the mount lug; and (b) to give the flat base of the fillister screw head a flat surface on which to bite. To mark the hole for drilling in the military sight base, I used a hole center punch which just barely fit inside the Chinese-drilled hole in the mount. I was afraid to drill into the barrel, so, by depth measurement, I stopped the drill just as it passed through the military sight base.
The hole for new screw C drilled & tapped, I leveled the top of the mount with the centerline of the rifle bore and tightened screws A, B, and D. Then I trimmed the end of screw C with a file until it fully tightened with 1/2 turn to spare. For more support, I could have used two 6-48 screws instead of or even in addition to 8-40 screw C.
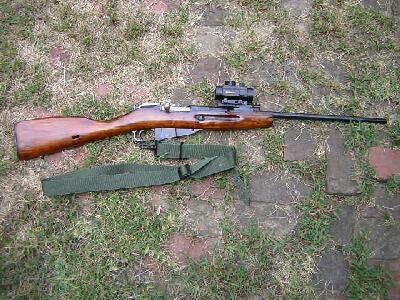
If I had used a "holo" red dot sight with its much lower center of mass, I probably would not have needed to drill & tap for a new screw C. Hindsight is always 20-20. Here's the M-44 & red dot ready for the woods. As you see it here it weighs 7 lbs 10 oz. The OAL is a handy 40 1/4" which is perfect for hunting in the thickets.
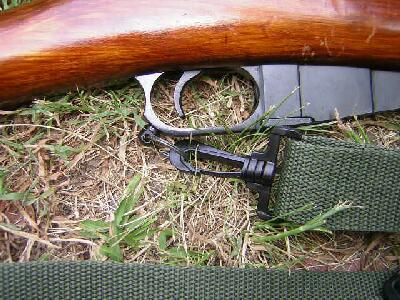
I added an Uncle Mike's sling swivel stud and a keychain ring so I could use one of my saddle ring slings on the rifle. A saddle ring sling will allow me to lean against a tree and keep my hands inside the parka and all dry and cozy while the Rain Rifle stays outside the parka all wet and ready. Sounds like a plan to me!
Here's an appendix about my $28 Simmons red dot sight. An identical red dot sight is sold under several brand names, but all of them probably originate in the same factory in China. Mine contained zero information about battery life. I own a sensitive ammeter, so I hooked it up to my sight's battery and checked the amperage at different scale settings. The scale around the battery box reads from 0 to 11. According to www.energizer.com the CR 2032 battery in my Simmons red dot sight is a 240 mAh battery. In other words, it can push out 240 milliamps for 1 hour. Or 24 milliamps for 10 hours. Or 2.4 milliamps for 100 hours. So. . . .
on 1 = .087 mA = 2758 hrs My dot is plenty bright on 5, so I'm not worried about battery life.
Here's the list of tools and parts from Brownells:
Screw A (both rifles):
Screw C (Rain Rifle):
Screw D (Rain Rifle):
|
